AutoML model training for sentiment analysis can be initiated only after creating the dataset. Follow the below steps to create an image dataset for image classification:
Step 1: Dataset creation
Navigate to the dataset module of vertex AI as shown in Figure 3.31:
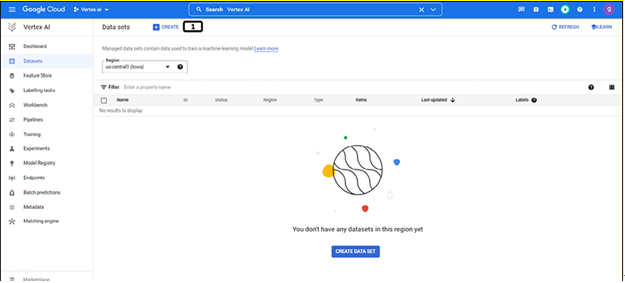
Figure 3.31: Landing page of the dataset
- Click on CREATE.
Step 2: Objective selection
The dataset creation tab will appear as shown the Figure 3.32:
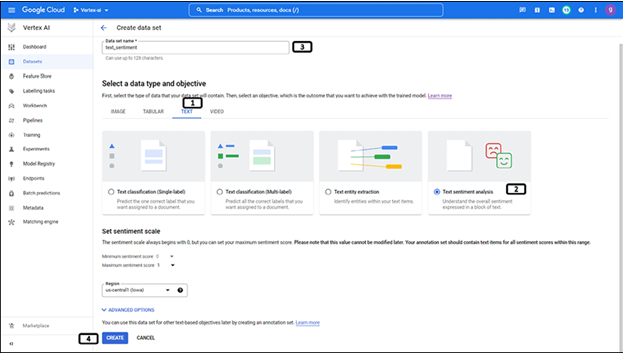
Figure 3.32: Dataset selection for text
- Select the Text tab.
- Select sentiment analysis.
- Provide a name for the dataset.
- Click on CREATE.
Step 3: Data selection
Data can be selected from cloud storage or local system. Follow the steps mentioned in Figure 3.33 to upload images from the cloud storage:
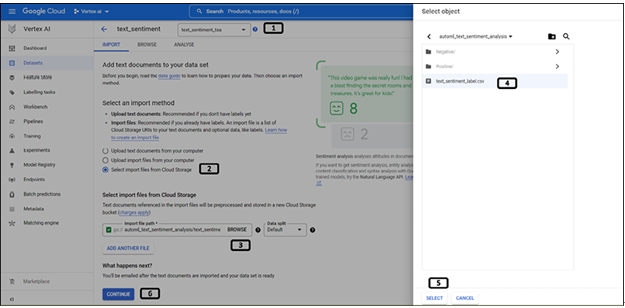
Figure 3.33: Data selection for text data
- Labels are stored in an annotation set which is associated with the model objective and will be automatically populated.
- Select to import files from the cloud storage.
- Click BROWSE.
- Choose the CSV file created (refer to Figure 3.29).
- Click SELECT.
- Click CONTINUE.
Step 4: Data importing complete
Once the data importing is complete, data (images) will reflect as shown in Figure 3.34:
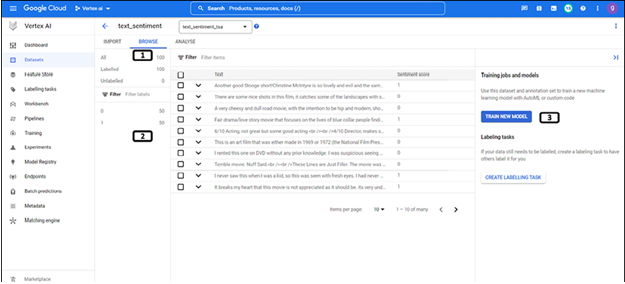
Figure 3.34: Text dataset data import complete
- Navigate to the BROWSE tab.
- Images uploaded are categorized as per the input CSV file.
- Click TRAIN NEW MODEL to start model training.
Once the dataset is created, it will be listed in the dataset module of the Vertex AI.
Note:
- It is required to provide at least 10 and not exceeding 100,000 total training documents. The recommendation is to have at least 100 documents per sentiment value.
- Sentiment score values must be consecutive integers starting from zero.
- Equal proportion of documents for each sentiment score
Once the dataset is created and the data is uploaded to the dataset, we can start training the AutoML model. Follow the below steps to initiate the model training:
Step 1: Model training method
Users will be navigated to the page as shown in Figure 3.35 after clicking on Train new model:
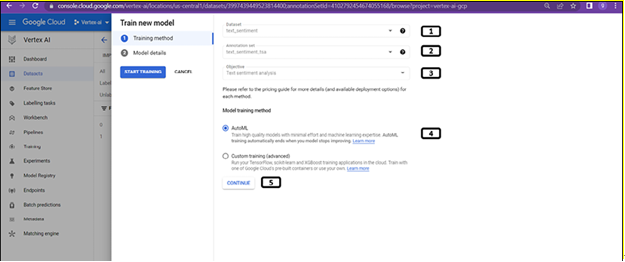
Figure 3.35: Training method selection for text dataset
- Created dataset will automatically be populated.
- Annotation set will also be automatically chosen.
- Objective which was chosen while creating a dataset is automatically chosen.
- Choose AutoML for training.
- Click CONTINUE.
Step 2: Model details
The next step in model training is users providing model details, follow the steps shown in Figure 3.36:
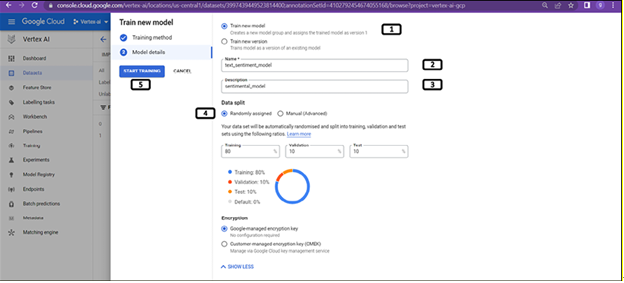
Figure 3.36: Model details for model training of text data
- Select Train new model (if a new version of the existing model is to be trained choose the below option).
- Provide the model’s name.
- Provide the model description.
- Choose randomly assigned (since we have given unassigned while creating CSV file). By default, 80% of the data will be used for training and 10% for validation and testing respectively. However, users can change as per their requirements.
- Click on START TRAINING.
Step 3: Model training complete
Once the model training is complete, the dataset page will be updated as shown in Figure 3.37:
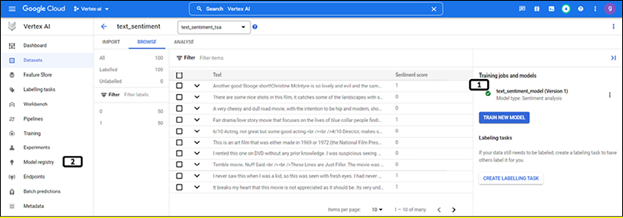
Figure 3.37: Model training status on the dataset page
- Green color tick indicates the completion of model training.
- Click Model registry.
Step 4: Model registry
The trained model will be listed in the model registry as shown in Figure 3.38:
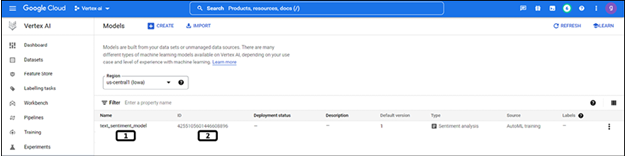
Figure 3.38: Trained model listed in model registry
- Trained model is listed with a user-provided model name. Click on the model name.
- Model ID, a unique ID for the model (which will be used for online predictions).
Step 7: Model version selection
Versions of the model are listed under the model registry as shown in Figure 3.39:
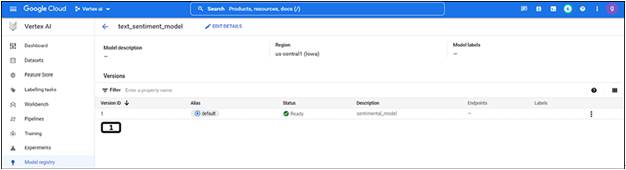
Figure 3.39: Model versions on the model registry
- Select the version of the model (since we have trained a new model, one version is available). Click on 1.
Note: Trained model will also be listed under the training module of Vertex AI as a training pipeline.